Showing posts with label Markers. Show all posts

Tuesday, January 31, 2012

Ketchup and Mustard and Brazilian Dimensional Embroidery

Picture a picture of ketchup and mustard, together.
Well, OK, they didn't do a lot to inspire me.

But this sure did!
This is a brand new rose introduced for 2012. It was on the cover of my Edmunds' Roses catalog that came in today's mail and kept me occupied for a while. It's a floribunda cleverly named "Ketchup and Mustard".   Mmmmm. Yum. Better than a chocolate chip cookie any old day!

It was enough inspiration that I stitched out a rose for a fellow Brazilian embroidery teacher, as a sample for her class.  Here it is:
This is a rose designed by Ruth Griffith, the original designer for the first JDR Brazilian Embroidery business. She calls it "Full-Blown Rose" and it's on her design "Mini-Roses", which I market for her as "A Millefiori Design by Ruth Griffith".  Here's a picture of the finished embroidery:
I posted the picture of Ruth's Full-Blown Rose because it is truly unique. There are three layers of petals and the two center layers are stitched in such a way that they stand well off the fabric. The petals tuck into each other to make a very realistic double rose center. Since I stitched just a sample of the rose, I pulled out my fabric marker pens and drew in the rose leaves.

Well, that's what I did today, besides daydreaming my way through a rose garden that I'm just SURE I have room for in my yard. I suppose I can go and put the ketchup and the mustard back into the refrigerator. I'll keep the rose catalog out a while longer.
Rosalie

Tuesday, November 22, 2011

TURKEY - Gobble, Gobble . . . It's Brazilian Dimensional Embroidery!


Happy Thanksgiving to all -- and a Happy Belated Thanksgiving to our Canadian neighbors!  This little turkey, one of my Millefiori Brazilian dimensional embroidery designs,  is stitched entirely with our Z-twist rayon floss and mostly cast-on stitches. The fruits and veggies are also embroidered entirely, except for the "grapes", which are size 6/o seed beads.

In my design description, I wrote about what a wonderful centerpiece this would be for your Thanksgiving table.  And think how happy the turkey would be!

Do you like the background? You can do that to your fabric, too. Using a stencil brush would probably be easiest (there are soft paints prepared especially for fabrics), but I did this background before screen printing the turkey design (because the ink we use for our lines washes out). I pinned a paper doily to the fabric, thinned some light sienna color acrylic paint to almost thinner than water consistency. Next, I put it into a mister bottle, or an airbrush and sprayed the paint onto the fabric. When I unpinned the doily, I had the beautiful lace pattern.
      You can try this with any textured material (as in rubbings), or spray paint over lace, or you can use a fabric brush marker or crayon (look for fabric crayons) to sketch interesting backgrounds or leaves, stems, fine growth, etc., onto your fabric. If you are stitching a holiday design, look for some of the sparkly white/silver paints.

Happy Holidays to all!
Rosalie

Thursday, September 8, 2011

A New Flower in Brazilian Dimensional Embroidery

This is a sneak peek of my newest rose, Heirloom (truly a lavender rose).
I was playing around with a stitch I developed a while back called the Piggyback Cast-on. I first wrote about it in my book Take A Stitch, and have used it on several of my Millefiori Brazilian dimensional embroidery designs.
This is a variation. I'm making a rose for a Rose Garden design I plan to release next summer, and also to teach at our BDEIG Seminar 2012.  So I'm giving you a preview.

I used a different method to finish the piggyback cast-on stitches and I added more cast-on stitches plus a bead (I like beads!) at the center.
          This is a lavender rose called "Heirloom". I have one growing in my rose garden here at my home, but somehow this one is much prettier.
Do you like it? I was very happy with the way it turned out.  And because I was just stitching a sample to see if the stitches worked, I didn't add any greenery - with floss.
Instead, I pulled out my trusty fabric markers (you remember these - they were on one of my blog pages for most of this summer), and drew some rose leaves.

And since I'm in a flowery mood, here's a photo I took of the Marco Polo Rose (yellow) growing in my garden:
...and my embroidery supervisor, Cuthbert:
...and Cuthbert, looking cute:

Thanks for stopping by!
Rosalie

Thursday, June 30, 2011

Look What I Found!

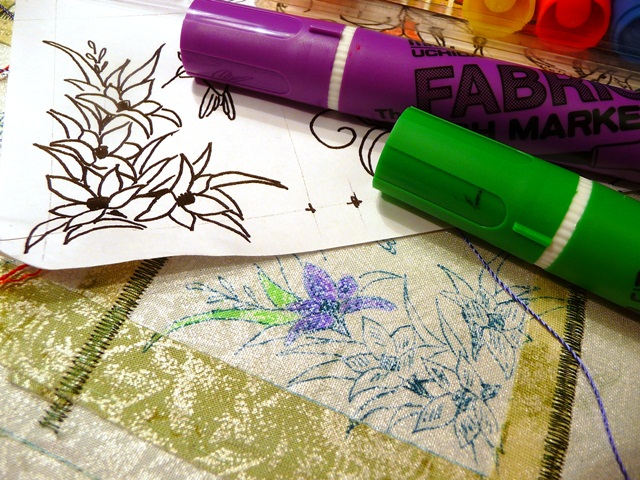
These are the new Sharpie Fabric Pens, called "Stained". I haven't tried them yet -- am still admiring them in the package. But they are handy when someone is stitching a sample Brazilian dimensional embroidery flower but doesn't feel like taking the time to stitch the leaves. (I LIKE to stitch leaves, and I especially like to draw leaves.)
     But sometimes I'm trying new flowers and know the leaves will be sort of ho-hum. I just draw them on with my fabric pen.

I'm thinking I might use these pens to color in some backgrounds here and there. They are probably a lot brighter than fabric crayons, but you never know until you try.

Before I show you some of the flowers I added "marker leaves" to, I should tell you that I found these at Amazon. I'm pretty sure Michaels, JoAnn's and other craft stores have them, with a coupon, too. Here are some of my tropical flowers from my book (Millefiori #940 - Tropical Flower Garden).
    This Maui Magnolia is made with a double cast-on drizzle, coiled around the bead and tacked to the fabric on one side only.
I wrote the names on the fabric sample with my Micron Pigma Pen. I try to let the ink wick from the pen into the fabric; otherwise, it's easy to break the pen tip.
    You can see that I've taken "artistic license" with the flowers, but that's OK. We are supposed to be creative stitchers!
For the Princess Flower, I made cast-on stitch spokes first and then wove the periwinkle color around and around, going through the cast-on stitch loops only. With a brush marker, you just turn the pen on its side and make a swipe like a comma (or as in tole painting).

This is my version of "Cup of Gold" (Latin name: Solandra).
I like the leaves. If I was using floss, I'd make 1-wrap French knots to edge the leaves -- not too original, but it's fun to try different leaf stitches when you have a lot of leaves on a design.
I didn't draw ALL the leaves on these little sample flowers. This design has contrasting-color leaf veins and highlight edging.  The flower is easy to stitch -- just draw a long oval and satin stitch vertically. Zig zag cast-on stitches over the top, as shown.
      And finally, this is the Sugarbush -- it was my favorite when I made it and I'm planning to use it again on one of my Millefiori designs -- simple stitches, but the petal arrangement causes the change in perspective.
My "Tropical Flower Garden" book is sold out. I'll probably reprint it, but most likely will use a lot of these flowers or stitches in other designs in the meantime.

Next time, I'll have a sample of my BRAND NEW STITCH. I'm making a flower tutorial as we speak (except I need to find another strand of Iris #083 in a matching dyelot). The stitch is a BRAND NEW way of doing one of our favorite basic stitches ... and that's the biggest hint I'm giving at the moment. The tutorial will be on the education pages of our BDEIG Newsletter, The B.E. Wrap-Up, and you will see it posted on the BDEIG Website in a few weeks.
     I think I might make a new flower to share with you here, too.  Next time.

Meanwhile, for your entertainment ...one of my kitties - Cuthbert, who else - has decided to check out packages to see what I bought at the store.
Yes, he has worked himself nicely into a trance. For those who don't know, Cuthbert is a Norwegian Forest Cat and is almost 7 years old. His faithless companion, Emmy, is A Woman of Mystery and is Ageless (meaning we got her at the rescue place).
This is Emmy.
...wondering why I woke her up to take yet ANOTHER picture!

See you soon! I will probably post pictures of REAL flowers next.
Rosalie

Monday, January 10, 2011

Hummy, Humming Right Along

I saw this quote somewhere,changed a couple of words, and then it just seemed to "fit" with our creative Brazilian embroidery needle art:

Brazilian embroidery is like playing the piano,
First you must learn to play by the rules,
then you must forget the rules and play from your heart

--Because once we learn the basic stitches, we can do whatever we want with them, all the while telling ourselves and nodding our heads vigorously in agreement with our profound thoughts, that THIS is art and an artist never has to color inside the lines.

Speaking of coloring...
     The Little Hummy Art Quilt that I'm playing with has lots of leaves (I think the original pattern was for appliqué so there are a LOT of teardrops and oval shapes). I wanted to distinguish the leaves from the flowers so I got out my Derwent watercolor pencils.
See? The petals and the leaves all blend together. I needed to remember where the flowers were, so I colored everything around the flower centers in 2 flower colors (I think I'll use a double cast-on to make these petals -- changing my mind at any time is optional.)

I wanted dark leaves and light leaves for contrast. Voilà! Colors were the answer, as I colored in the pattern sheet.
       By the way -- interrupting myself here -- I tried to choose different stitches for each window pane's leaves -- buttonhole or blanket stitch, alternating satin stitch, satin stitch across entire leaf, fly stitch, etc...   Just for variety.  And because I could.

You can tell that I'm working on a textured background and sometimes the Marvy wash-out pen lines don't show as clearly as I would like.  So .... I went in search of my Marvy Permanent Brush Markers (discovered at Michaels with my 40% coupon).
There they are!  Nice juicy neon colors.
..and I colored directly on the fabric. Yes, I stayed inside the lines -- this time. Just a dab of color here and there distinguished the leaves from the flower petals (see the pattern?). 
     And then I stitched.  And I've decided that if I don't totally fill in an area with floss, the color I added will blend with the leaf or flower petal.

By the way, you know this is a blog about Brazilian embroidery. Mostly.  I'm using EdMar rayon floss for everything, although I do padding with 4 strands of cotton embroidery thread, and sparkly beads and other fibers always seem to find their way into my work. The floss is so pretty and the extra sparkles just add to its beauty. 

I have more pictures. I've been stitching all week while my blog was loafing, so I'll add more tomorrow or the next day.
     I hope you're enjoying these notes. Whenever I figure out how to comment about your comments, I'll add a comment myself.  I'll also add more links - something for you to click while you take a break from your own stitching.