Showing posts with label Crayons. Show all posts

Monday, February 7, 2011

A Valentine for You - Crayons and Pansies and Brazilian Dimensional Embroidery

Pansies, a traditional favorite with Brazilian dimensional embroidery artists, take on a brand new look with this vintage Millefiori Valentine's Day design (meaning I designed and stitched it a long, long time ago -- enough to make me a "vintage stitcher").
I'm pretty sure I still have the Millefiori pattern and instructions available for this design, but I'll tell you what I did and you can try it yourself if you like.
       First, I found a pretty picture of some pansies - it might have been from a greeting card. Then I went in search of my fabric crayons. And I needed tracing paper.
I colored the pansies onto the tracing paper, using a light touch for pastel areas. (When you iron fabric crayon tracings onto fabric, they will always transfer "brighter". Keep in mind that they will also give a "reverse" image.) Next, I ironed the colored pattern onto a simple pansy design that was already screen printed onto my cream poplin fabric.

As you can see from the embroidery, these simple pansies are stitched with cast-on stitches plus an added row of detached buttonhole stitches in each cast-on loop. Pansies always have a yellow center and you can add a bead (a pretty little yellow heart-shaped bead would be nice!) or a French or colonial knot.

     This is also a nice way to "dress up" your Brazilian embroidery designs!

If you'd like to make one for your own personal use, you have my permission to copy/paste that image above onto paper and transfer it to fabric.

I think this design would also make a really pretty little fabric postcard. Incidentally, fabric postcards make excellent substitute doodle cloths for our experimental stitches -- and floss tails. This is my floss tail collection:

It started out as a jar of animal crackers.  I re-purposed or up-purposed it (I'm not sure what the difference is. It's recycled.) 
       OK, you can stop laughing now!  I've been stitching for a LONG time ...and you can see that I don't throw things away very often, so I have a LOT of floss. I thought about using the floss tails sandwiched between two layers of water soluble Solvy and machine stitching over to make "fabric" -- might even do that one of these days.  In the meantime, I have found other uses for my rayon floss leftovers. This little project started out as a tomato pincushion...
The hat is "freeform" Brazilian embroidery. I drew a line around the middle of the pincushion and started attaching floss tails, just made a square knot to anchor them. The little plastic sunglasses are leftovers from somewhere or other. The tomato is upended (stem side down) and rests on a crystal goblet.

     Can you tell that I have a lot of fun playing with my floss?

Monday, January 10, 2011

Hummy, Humming Right Along

I saw this quote somewhere,changed a couple of words, and then it just seemed to "fit" with our creative Brazilian embroidery needle art:

Brazilian embroidery is like playing the piano,
First you must learn to play by the rules,
then you must forget the rules and play from your heart

--Because once we learn the basic stitches, we can do whatever we want with them, all the while telling ourselves and nodding our heads vigorously in agreement with our profound thoughts, that THIS is art and an artist never has to color inside the lines.

Speaking of coloring...
     The Little Hummy Art Quilt that I'm playing with has lots of leaves (I think the original pattern was for appliqué so there are a LOT of teardrops and oval shapes). I wanted to distinguish the leaves from the flowers so I got out my Derwent watercolor pencils.
See? The petals and the leaves all blend together. I needed to remember where the flowers were, so I colored everything around the flower centers in 2 flower colors (I think I'll use a double cast-on to make these petals -- changing my mind at any time is optional.)

I wanted dark leaves and light leaves for contrast. Voilà! Colors were the answer, as I colored in the pattern sheet.
       By the way -- interrupting myself here -- I tried to choose different stitches for each window pane's leaves -- buttonhole or blanket stitch, alternating satin stitch, satin stitch across entire leaf, fly stitch, etc...   Just for variety.  And because I could.

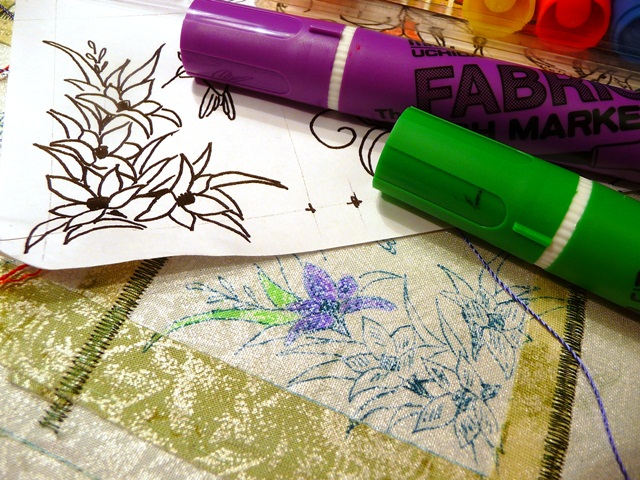
You can tell that I'm working on a textured background and sometimes the Marvy wash-out pen lines don't show as clearly as I would like.  So .... I went in search of my Marvy Permanent Brush Markers (discovered at Michaels with my 40% coupon).
There they are!  Nice juicy neon colors.
..and I colored directly on the fabric. Yes, I stayed inside the lines -- this time. Just a dab of color here and there distinguished the leaves from the flower petals (see the pattern?). 
     And then I stitched.  And I've decided that if I don't totally fill in an area with floss, the color I added will blend with the leaf or flower petal.

By the way, you know this is a blog about Brazilian embroidery. Mostly.  I'm using EdMar rayon floss for everything, although I do padding with 4 strands of cotton embroidery thread, and sparkly beads and other fibers always seem to find their way into my work. The floss is so pretty and the extra sparkles just add to its beauty. 

I have more pictures. I've been stitching all week while my blog was loafing, so I'll add more tomorrow or the next day.
     I hope you're enjoying these notes. Whenever I figure out how to comment about your comments, I'll add a comment myself.  I'll also add more links - something for you to click while you take a break from your own stitching.