Tuesday, November 22, 2011

TURKEY - Gobble, Gobble . . . It's Brazilian Dimensional Embroidery!


Happy Thanksgiving to all -- and a Happy Belated Thanksgiving to our Canadian neighbors!  This little turkey, one of my Millefiori Brazilian dimensional embroidery designs,  is stitched entirely with our Z-twist rayon floss and mostly cast-on stitches. The fruits and veggies are also embroidered entirely, except for the "grapes", which are size 6/o seed beads.

In my design description, I wrote about what a wonderful centerpiece this would be for your Thanksgiving table.  And think how happy the turkey would be!

Do you like the background? You can do that to your fabric, too. Using a stencil brush would probably be easiest (there are soft paints prepared especially for fabrics), but I did this background before screen printing the turkey design (because the ink we use for our lines washes out). I pinned a paper doily to the fabric, thinned some light sienna color acrylic paint to almost thinner than water consistency. Next, I put it into a mister bottle, or an airbrush and sprayed the paint onto the fabric. When I unpinned the doily, I had the beautiful lace pattern.
      You can try this with any textured material (as in rubbings), or spray paint over lace, or you can use a fabric brush marker or crayon (look for fabric crayons) to sketch interesting backgrounds or leaves, stems, fine growth, etc., onto your fabric. If you are stitching a holiday design, look for some of the sparkly white/silver paints.

Happy Holidays to all!
Rosalie

Monday, November 14, 2011

Designing for Brazilian Dimensional Embroidery

From time to time, I'm writing notes about designing for Brazilian dimensional emroidery -- hand embroidery with Z-twist rayon threads in several weights and featuring motifs that are mainly floral. (Cats and armadillos and hedgehogs have, however, occasionally dropped by to visit one, two or ten of my Millefiori designs.)

But many of our stitchers enjoy creating flowers. It's very easy to make your own using the tools in Microsoft Word or Publisher - or any other graphics app.
This is the command for shapes from the Microsoft Word 2010 toolbar:
You can see that you have lots of choices to play with. These shapes can be combined, distorted, poked, prodded and stretched to give interesting results.
See:
That donut shape, when you open it in a Word document (or Publisher) has a little yellow diamond (not shown). The diamond in the second top image has been drug to the center of the circle. Adjusting this shape will give you a flower center in the diameter of your choice.

The second set of shapes, the 8-point star also has a little yellow diamond that can be moved to the center for a flower with eight dividing petals. (Other circle divisions are available, up to 32 or more (if you copy/paste/group). Usually 3, 5, 6 or 8 petals on one flower are enough to make most stitchers happy.

The star in MS Word 2010 also draws into a 5-part division. You can see it has been used to divide a circle into 5 parts. There's also a handy heart shape in these "Shapes" and many other designs.

Mostly it's just a matter of playing around with shapes to give you something new.

OK, now for the designing part. Remember those leaves I suggested you play with here? [Scroll down] Open a new Word document. Drop in one of the circles or stars, or a triangle. Add a leaf or three (uneven numbers are tastefully artistic, according to "peeps who are supposed to know these things").

Once you have circles and/or leaves positioned where you want them, sharpen a pencil and start drawing other pieces and parts to fill out your design. I'll usually start with the circles or triangles, print the page, and then start drawing to add ideas for the rest of the design. By the way, templates also work just as well as the Shapes in Word, and you can find them in a variety of sizes at your local office supply or art store.  ...and an eraser. Don't forget the eraser! 

Trace your pieces and parts onto fabric, thread your needle and you're ready to go!  Don't doubt yourself. You are already an artist if you are stitching Brazilian dimensional embroidery. Just draw lots of pictures, write notes in the margins. If you see a flower or a stitch technique that you like and want to include it, contact the designer to ask for permission and always give credit. (If you clicked that link, you'll see that it goes to my own email. I'm always happy to share the stitches and techniques that I've been lucky enough to develop.)

Be sure to write notes - the floss colors you use, amounts, and notes about the stitches. Have fun. Let me know if you have some designing questions and I'll write more.

And if you are still with me after this long-and-windy post, here's a flower in Brazilian dimensional embroidery to keep you entertained. It's one of the flowers I used in my ABCs for Brazilian Dimensional Embroidery book (cover shown above). The stitch is the Barbed Bullion I first described in my book Take A Stitch.
Your turn now!
Rosalie

Saturday, November 12, 2011

Cuthbert, and a Brazilian Dimensional Embroidered Peony

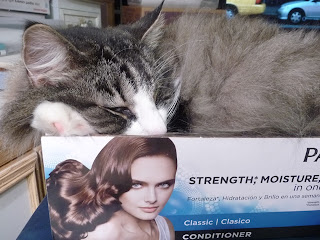
This is Cuthbert. My cat. At rest. As usual.
This is Cuthbert, aware that "someone" is disturbing his nap.
This is Cuthbert, delicately (he is a 15-plus-pound Norwegian Forest Cat) balanced on the very edge of the table.
This is Cuthbert, continuing his nap.
This is Cuthbert, pointing out the fact that he is "A Very Useful Cat" - multi-talented as a duster-helper.

And this is Cuthbert, trying to make sure I have all of the details of his biography exact, as I write this post:
And THIS is Cuthbert, from a while back, showing off his Total Magnificence, since he feels this story is all about him.
Thanks for stopping by to visit.
    
Oh, wait!  You were expecting flowers?  In Brazilian dimensional embroidery?
OK.
This is a Double Flowering Peony  from one of my Millefiori designs called "Drizzleberry Punch'. I designed the center dimensional drizzle/cast-on combination and have used the original technique on several other designs.
It was my interpretation of this double peony:
Rosalie


Saturday, November 5, 2011

I Got Tired of Looking at the Cat . . .

So here's a picture of a Brazilian dimensional embroidered flower:

The hibiscus is from my book (Rosalie Wakefield) My LadyFlowers, and one of my favorite stitch combinations for petals that stand firmly off the fabric.
Rosalie