This picture is from one of my Millefiori B.E. designs:
 I posted it here to keep everyone interested and reading on to the "good part",
hints and tips about stitching leaves and no stems. The design is #993 "Field of Flowers". I originally designed it to use up all of my odd floss colors.
I posted it here to keep everyone interested and reading on to the "good part",
hints and tips about stitching leaves and no stems. The design is #993 "Field of Flowers". I originally designed it to use up all of my odd floss colors.

Fans of Brazilian dimensional embroidery were pretty much underwhelmed.
So I pulled out a piece of white fabric and all of the Iris #227 (Pale Sea Green) floss I could find in my stash, some pale green beads (because I'm almost never without a bead or two next to my embroidery), and stitched this busy, busy, flower-and-technique-filled design in monochromatic colors. See what happened:
 I framed it as a small art quilt. I've also learned that it's a good idea to have your quilt fabric handy so that you can match fabric and floss colors. Here's a picture of the finished design, made into the little quilt:
 I'm not really A True Quilter, but I know how to sew the fabric together (somewhat). These little quilts are a nice alternate framing idea for our Brazilian dimensional embroidery.
Well, now I'll talk about The Main Subject of this post ... optical illusion and Brazilian dimensional embroidery.
Stems, leaves. Lazy Daisy leaves and evergreen leaves.
The idea is to decrease bulk and still have a graceful, elegant background for our dimensional flowers. When we receive a B.E. design on fabric, those blue lines will wash out. Often the entire stem and all leaves are drawn on the fabric. Of course, just because they are there, that doesn't mean we have to cover every line with floss! Here's where the optical illusion comes in.
This is a finished branch covered with lazy daisy leaves. We often stem (or outline) stitch the branch first and then add the leaves, as shown below.
 But we don't have to do that! Look at the diagram below. No stem is stitched. I'll bet your eye was fooled!
(It's called trompe l'oeil, literally meaning 'fool the eye', and is pronounced: TROM-loy.) A note of caution -- it does NOT work when I step on my bathroom scale. It's also easier to say "optical illusion".
 Now, when I show you the diagram without the stem, you'll see what I mean. Your eye will tell you there is a stem; you will not have bulky embroidery, and it looks just fine. See?
 Notice those lazy daisy stitches? They are slightly offset - one side just a bit longer than the other. This makes it easy to tuck all of those stiches along a stem line. Just be sure that the short end of the stitch is beneath the long side of the stitch (not shown here). Here's a step-by-step diagram:
 And here's a picture:
 This "off-setting technique" also works with evergreen leaves, which are basically just straight stitches (although the idea of Glory bullions for each is rather interesting...). See:
 (It will look a lot better when the flowers are added and the blue lines washed out, I promise...)
You can choose your own method of stitching -- the regular lazy daisy stitch (or detached chain, as named in stitch directories), the off-set lazy daisy stitch, and at the far right, the twisted lazy daisy stitch. Select the method you like best.
And if you are being more adventurous (I'm sure I've written about this before, but it's like repetition for emphasis to reinforce learning.), you can stitch your leaves with the Reverse Lazy Daisy Stitch. This stitch starts farther away from the center branch (which is stitched) and the tacking stitch becomes the leaf "stem". See (bottom diagram):
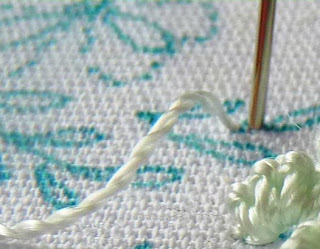
 Just always remember to be adventurous in your embroidery. Try new things, be creative, have fun! Here's another close-up photo from my "Field of Flowers" design:
 And now I'm going to go back to stitching. I'll show you my new project soon. It's also quilt-related (sigh).....


So I pulled out a piece of white fabric and all of the Iris #227 (Pale Sea Green) floss I could find in my stash, some pale green beads (because I'm almost never without a bead or two next to my embroidery), and stitched this busy, busy, flower-and-technique-filled design in monochromatic colors. See what happened:


Well, now I'll talk about The Main Subject of this post ... optical illusion and Brazilian dimensional embroidery.
Stems, leaves. Lazy Daisy leaves and evergreen leaves.
The idea is to decrease bulk and still have a graceful, elegant background for our dimensional flowers. When we receive a B.E. design on fabric, those blue lines will wash out. Often the entire stem and all leaves are drawn on the fabric. Of course, just because they are there, that doesn't mean we have to cover every line with floss! Here's where the optical illusion comes in.
This is a finished branch covered with lazy daisy leaves. We often stem (or outline) stitch the branch first and then add the leaves, as shown below.
(It's called trompe l'oeil, literally meaning 'fool the eye', and is pronounced: TROM-loy.) A note of caution -- it does NOT work when I step on my bathroom scale. It's also easier to say "optical illusion".


You can choose your own method of stitching -- the regular lazy daisy stitch (or detached chain, as named in stitch directories), the off-set lazy daisy stitch, and at the far right, the twisted lazy daisy stitch. Select the method you like best.
And if you are being more adventurous (I'm sure I've written about this before, but it's like repetition for emphasis to reinforce learning.), you can stitch your leaves with the Reverse Lazy Daisy Stitch. This stitch starts farther away from the center branch (which is stitched) and the tacking stitch becomes the leaf "stem". See (bottom diagram):

Rosalie
Oh, this is over the top gorgeous!!! Love that faint color on white! Just beautiful!
ReplyDeleteThank you, Julie. When I'm doing these quilty things, I find it's easier to have my fabric first and then match the floss to it.
ReplyDeleteThis is awesome>
ReplyDeleteThis is gorgeous.
ReplyDeleteestoy maravillada con tu blog, acabo de encontrarlo, hace rato venia buscando este bordado tan elegante y colorido, gracias, muchas gracias.
ReplyDelete